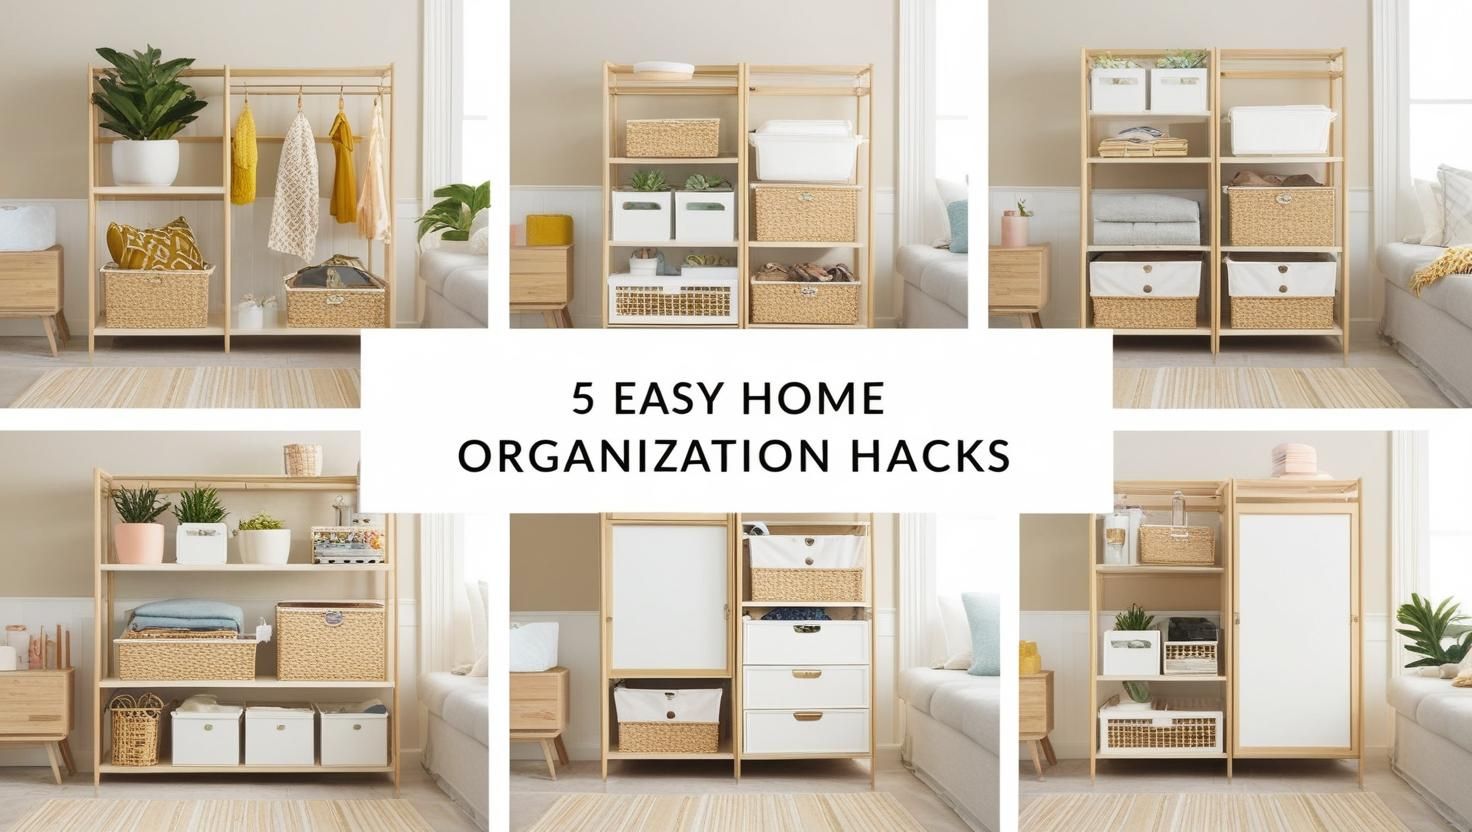
Keeping your home organized can sometimes feel like a never-ending task. But with a few simple hacks, you can make it easier and even fun! Here are five easy ways to keep things tidy:
1. Use Baskets for Everything: Baskets are perfect for grouping similar items and keeping shelves neat.
Keeping things tidy becomes a breeze when you know exactly where everything belongs. Baskets not only help group similar items but also make your space look more organized and visually appealing. Here’s how to get started:
Step 1: Identify Areas That Need Organizing
Look around your home and identify clutter-prone areas. These are usually places where things accumulate without a designated storage solution—like shelves, countertops, or open cabinets.
Step 2: Choose the Right Baskets for Each Area
Not all baskets are created equal! Choose baskets based on the size of the items you want to store and the aesthetic you want to achieve.
Tips for choosing baskets:
- Small baskets: Great for storing smaller items like toiletries, remote controls, or kitchen condiments.
- Medium baskets: Ideal for grouping items like pantry goods, folded clothes, or craft supplies.
- Large baskets: Perfect for bulkier items such as blankets, pillows, or toys.
👉🏼 You can buy a nice and cheap set of baskets here.
Step 3: Group Similar Items Together
Once you’ve chosen your baskets, group similar items into categories. This not only helps maintain order but also makes it easier to find what you need quickly.
Examples:
- In the kitchen, group snacks, canned goods, and condiments separately into different baskets.
- In the bathroom, use one basket for hair products, another for skincare, and a third for first-aid supplies.
- In the living room, use baskets to separate magazines, electronic accessories, and kids’ toys.
Step 4: Label Your Baskets
Labeling baskets ensures that everyone in the household knows what goes where, making it easier to keep things organized in the long run.
Labeling ideas:
- Use chalkboard labels for flexibility—you can erase and rewrite labels when needed.
- Try pre-printed labels for a neat and uniform look.
- For a DIY approach, use gift tags and string to create rustic-looking labels.
👉🏼 We recommend to buy these chalkboard label rolls for plastic organizers
👉🏼 These you can buy for the metal baskets
Step 5: Find the Right Spot for Your Baskets
Placement matters! Make sure each basket is placed in an accessible and logical spot.
Examples:
- Place a basket with snacks on a lower kitchen shelf so it’s easy to grab.
- Keep a basket for toiletries near the bathroom sink.
- Use a decorative basket in the living room to store throw blankets and keep them within reach.
Step 6: Maintain the System
To keep things tidy, develop a habit of putting items back in their designated baskets after use. You can also do a quick check once a week to ensure everything is in its proper place.
Bonus Tip:
Rotate seasonal items. For example, store winter accessories in baskets during cold months, and swap them out for summer essentials when the weather warms up.
Why This Works?
Baskets simplify organization by providing a clear system for grouping and storing items. They’re easy to move, visually appealing, and versatile for any room in the house. By following this step-by-step approach, you’ll have a clutter-free home in no time!
Example:
- The kitchen counter cluttered with spice jars and snacks.
- A bathroom shelf filled with toiletries and skincare products.
- The living room with scattered remote controls, magazines, and toys.
2. Label Storage Boxes: Step-by-Step Visual Guide
Labeling storage boxes is a game-changer for keeping your home organized. Whether it’s in the kitchen, the garage, or your kid’s room, clear labels help you quickly find things and ensure everything stays in its designated place.
Step 1: Choose the Right Storage Boxes
The first step is selecting the right storage boxes for your needs. Choose boxes based on the type of items you want to store.
Tips for choosing boxes:
- Use clear boxes for easy visibility of contents.
- Use opaque boxes for seasonal items or things you don’t want on display.
- Opt for stackable boxes to save space.
Step 2: Sort and Group Items
Before labeling, sort through your items and group them by category. This ensures that each box contains related items, making it easier to stay organized.
Examples:
- Toys: Separate by type (e.g., action figures, building blocks, stuffed animals).
- Pantry items: Group similar foods together (e.g., snacks, baking supplies, grains).
- Office supplies: Group by type (e.g., pens, paper, cables).
Step 3: Create Labels
Create labels that clearly describe the contents of each box. You can use a label maker, printable labels, or even handwritten tags.
Labeling Ideas:
- Label maker: Provides neat and uniform labels.
- Chalkboard labels: Reusable and great for frequently changing contents.
- Printable tags: Available online for download and customization.
Step 4: Attach the Labels
Once your labels are ready, attach them to the front or top of each box, depending on how you plan to stack or store them.
Placement Tips:
- Attach labels to the front of boxes for easy visibility when they are stacked.
- For clear boxes, you can place labels inside to avoid them peeling off.
Step 5: Maintain and Update Labels
As your needs change, make sure to update the labels accordingly. If you’re using chalkboard or reusable labels, it’s easy to erase and rewrite them.
Why This Works?
Labeling storage boxes eliminates the guesswork and saves time when looking for specific items. It keeps your home more organized and makes tidying up easier for everyone in the household.
3. Declutter Regularly: Set aside 10 minutes each week to get rid of things you no longer need.
Decluttering regularly is essential to keeping your home neat and organized. By setting aside just 10 minutes each week, you can prevent clutter from taking over and maintain a stress-free living environment. Here’s a step-by-step guide to help you make decluttering a habit.
Step 1: Choose a Specific Area to Declutter
Instead of trying to tackle your entire home at once, choose one small area to focus on each week. This makes the task more manageable and less overwhelming.
Examples:
- A single kitchen drawer.
- One shelf in your closet.
- A corner of your living room with piled-up magazines
Step 2: Set a Timer for 10 Minutes
To keep things quick and efficient, set a timer for 10 minutes. This helps you stay focused and ensures that decluttering doesn’t feel like a never-ending task.
Step 3: Sort Items into Three Categories
As you declutter, sort items into three categories: Keep, Donate/Sell, and Discard.
Sorting Tips:
- Keep: Items you use frequently or have sentimental value.
- Donate/Sell: Items in good condition that you no longer need.
- Discard: Broken or unusable items that can’t be donated or sold.
Step 4: Quickly Organize What You Keep
Once you’ve sorted everything, return the items you’re keeping to their proper places. Use storage solutions like baskets or bins to keep things neat.
Step 5: Dispose of the Discard Pile Immediately
To avoid the clutter returning, immediately dispose of the items in the Discard pile. Put them in the trash or recycling bin.
Step 6: Set a Reminder for Next Week
Consistency is key to maintaining a clutter-free home. Set a weekly reminder on your phone or calendar to repeat this process.
Bonus Tip: The One-Year Rule
If you’re unsure whether to keep or discard an item, use the one-year rule:
If you haven’t used it in the past year, you probably don’t need it.
Why This Works?
Decluttering regularly in short, focused bursts prevents clutter from building up and keeps your home manageable. It also saves you from the stress of having to do large, time-consuming cleanups.
4. Create a Drop Zone: Step-by-Step Guide
Having a drop zone near your door is an easy and effective way to keep your home organized and prevent clutter from piling up at the entrance. This dedicated spot will make it easier to grab essentials when heading out and help everyone in the household maintain order.
Step 1: Choose a Convenient Location
Select a spot near your main entrance where it’s natural to drop items as soon as you come home. This could be right by the front door, in a hallway, or even in the entryway if you have one.
Step 2: Set Up a Surface for Small Items
Place a small table, shelf, or console near the door. This will serve as the main surface for items like keys, wallets, and phones. For example, this is a 👉🏼 good idea.
Step 3: Use Trays or Bowls for Organization
To prevent the surface from getting cluttered, use a tray or small bowl to contain smaller items like keys, coins, and earbuds. This helps keep everything in one place and makes it easier to find them when needed.
Step 4: Add Hooks for Bags and Coats
Install a few hooks on the wall to hang bags, coats, and scarves. This keeps these items off the floor and ensures they’re easy to grab when you’re heading out.
Step 5: Include a Basket or Shoe Rack
Place a basket or a shoe rack near the door for footwear. This keeps shoes from being scattered around the entrance and helps maintain a clean and organized look.
Step 6: Personalize Your Drop Zone
Make the drop zone inviting by adding a personal touch. You can decorate it with a small plant, a family photo, or a decorative sign. A mirror above the table can also be a great addition, making it easier to check your appearance before leaving.
Bonus Tip: Regularly Declutter the Drop Zone
Since the drop zone can easily accumulate random items, make it a habit to declutter it once a week. Remove any items that don’t belong and return them to their proper places.
Why This Works?
A dedicated drop zone helps reduce clutter at the entrance and ensures that essential items are always within easy reach. It’s a simple solution that makes leaving and returning home a stress-free experience.
5. Vertical Storage: Step-by-Step Guide
When you’re short on floor space, the best way to go is up! Vertical storage helps you make the most of your walls while keeping your home tidy and organized. Here’s how to effectively use vertical storage solutions in different parts of your home:
For example, this is superb shoes rack for a small spaces. 👉🏼 Shoe Rack Organizer
Step 1: Identify Unused Wall Space
Look around your home for empty walls that could be used for vertical storage. This can be in the living room, kitchen, bathroom, or even the garage.
Examples:
- A bare wall in the living room.
- Empty space above the kitchen counter.
- The area behind a bathroom door.
Step 2: Install Wall-Mounted Shelves
Wall-mounted shelves are a great way to store and display items without using any floor space. Choose shelves that match your home’s style and are sturdy enough for the items you plan to store.
Tips:
- Use floating shelves for a clean, modern look.
- For heavier items like books, opt for bracketed shelves for added support.
Step 3: Use Hooks for Hanging
Hooks are a versatile and inexpensive vertical storage solution. They can be used to hang a variety of items, from coats and bags to kitchen utensils and tools.
Ideas for using hooks:
- In the hallway: Hang coats, hats, and bags.
- In the kitchen: Hang mugs, pans, and utensils.
- In the bathroom: Hang towels, bathrobes, or even small baskets.
Step 4: Add Pegboards for Flexible Storage
Pegboards are a great way to create customizable vertical storage. They’re especially useful in kitchens, offices, and garages, where you can hang different tools and supplies.
How to use pegboards:
- Attach hooks, baskets, and small shelves to store frequently used items.
- Rearrange the layout as your needs change.
Step 5: Use Over-the-Door Organizers
Over-the-door organizers make use of the often-forgotten space behind doors. These are perfect for storing shoes, cleaning supplies, or small items in a bedroom or bathroom.
Step 6: Don’t Forget Decorative Storage
Vertical storage doesn’t have to be purely functional—it can also be decorative. Use shelves to display framed photos, plants, or other decorative items that add personality to your space.
Bonus Tip: Keep It Balanced
When using vertical storage, make sure not to overload your walls. Too many shelves or hooks can make a space look cluttered. Aim for a balance between function and aesthetics.
Why This Works
By using wall-mounted shelves, hooks, pegboards, and over-the-door organizers, you free up valuable floor space and make your home look more open and tidy. Vertical storage is an efficient way to maximize your space while keeping things accessible and visually appealing.


